In this tutorial, we will run through a quick guide on how to achieve object movement, one of the foundations of game development. We won't be doing anything fancy, just bouncing a ball across the screen. However, the principles in this tutorial can be easily applied in many more complex scenarios. Without further delay, let's jump right in!
The Setup
Before we start to write any code, let's create our basic file structure.
First create your Android project. Name the project "Movement" and match the rest of your project settings with the photo below:
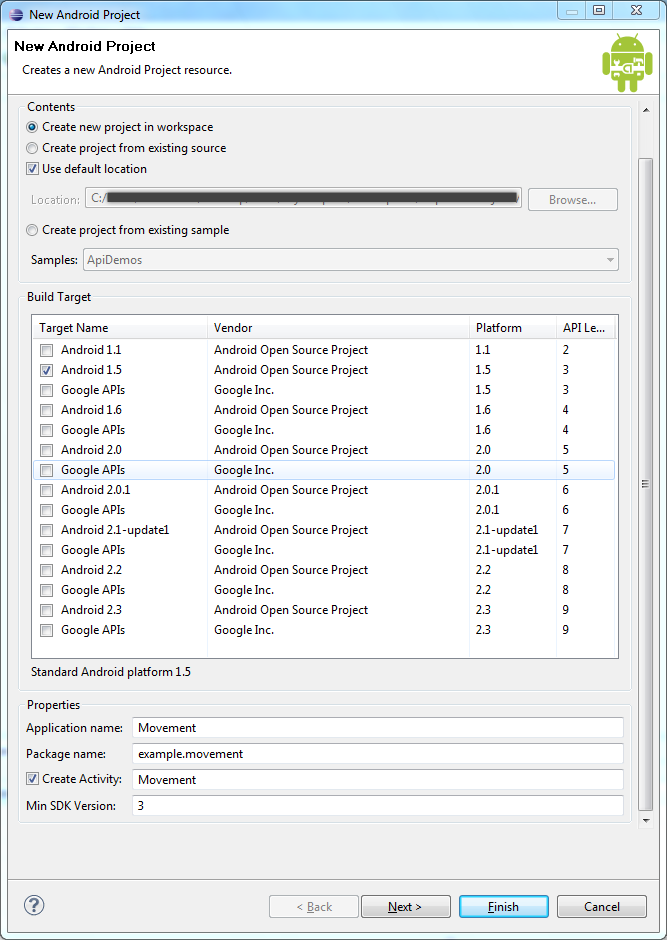
You will notice that the API level is pretty low since all features used here are very basic and have been used since day one in Android.
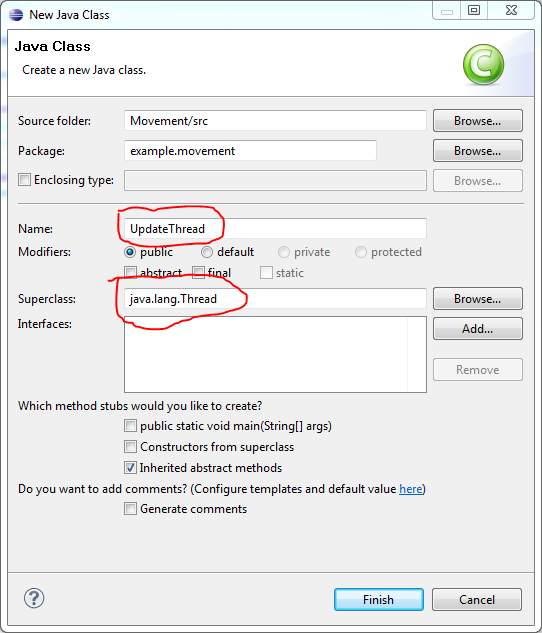
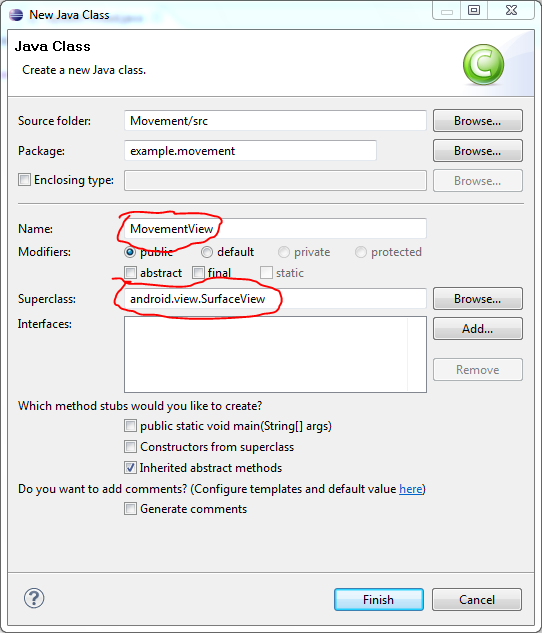
Next, we will create two more classes for our project. Specifically, the UpdateThread class and MovementView class, which are our Thread and SurfaceView objects respectively. More on these later. Pay attention to the class name and superclass of these classes; I will be referencing these throughout the tutorial.
That's all the set up we've got to do for the project! If everything went OK, your project folder should look like this:
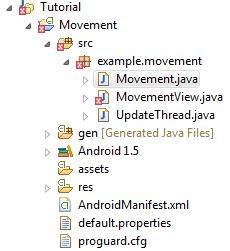
Don't worry about the single error you have at the moment, it will be corrected very soon!
Before we go any further, be warned: all of these snippets of code look extremely long in this format! But do not worry, most of it is just comments for this tutorial. Without the comments it would be less than half the length. Don't let this put you off!
Section One: Coding the Activity
Your application Activity, Movement.java, is the base of your app. It get's called at the very beginning of the app life cycle, and is needed to call into action any other Activity or SurfaceView you might want to run.
Our activity will be very simple. In fact, we will only be editing one line of code! This is all we need to launch our MovementView class.
Step 1: Activity Imports
package example.movement;

import android.app.Activity;
import android.os.Bundle;
Step 2: The Class and onCreate Method
This is the first code executed in our app. Note the use of the setContentView() method where we set the app's view to our MovementView class, in which all drawing will take place. We also pass "this" into the constructor.
public class Movement extends Activity {

    @Override
    public void onCreate(Bundle savedInstanceState) {

		super.onCreate(savedInstanceState);
		setContentView(new MovementView(this));
    }
}
And thats all we have to do with the Activity class for the rest of the project!
The SurfaceView
What is the SurfaceView? Our SurfaceView is the class MovementView.java. All a SurfaceView does is provide a big drawing pad for our app. In this view we can draw onto the Canvas and it will displace it for us. We will be using this to create a ball from pure code and draw it in a new position everytime the UpdateThread tells it to. Let's jump right in and fix that annoying error created when we started our project by opening up MovementView.java.
Step 3: SurfaceView Imports
package example.movement;

import android.content.Context;
import android.graphics.Canvas;
import android.graphics.Color;
import android.graphics.Paint;
import android.graphics.Rect;
import android.view.SurfaceHolder;
import android.view.SurfaceView;
Step 4: SurfaceView Class Outline
Notice that our class extends SurfaceHolder.Callback. This is what allows the view to detect things like the surface being created, changed or destroyed - very useful! All steps following this will be the methods and functions that should be placed inside this class. We will also define our variables here, hopefully the names of these will become self explanatory as the tutorial progresses.
public class MovementView extends SurfaceView implements SurfaceHolder.Callback {
	private int xPos;
	private int yPos;

	private int xVel;
	private int yVel;

	private int width;
	private int height;

	private int circleRadius;
	private Paint circlePaint;

	UpdateThread updateThread;
}
Step 5: MovementView Constructor
In this method we accomplish the following tasks:
- Call the super() method to give us our SurfaceView to work with.
- Link the class up with the SurfaceHolder.Callback
- Initialize variables regarding the circle
- Set the speed of movement in each direction
public MovementView(Context context) {
    super(context);
    getHolder().addCallback(this);

    circleRadius = 10;
    circlePaint = new Paint();
    circlePaint.setColor(Color.BLUE);

    xVel = 2;
    yVel = 2;
}
Step 6: The onDraw Method
This is the function that will be called to draw the circle on each frame. It accomplishes two very simple tasks:
- Repaint the Canvas all black to cover the previous frame.
- Draw the new circle at the new set of coordinates.
	@Override
	protected void onDraw(Canvas canvas) {

		// you can always experiment by removing this line if you wish!
		canvas.drawColor(Color.WHITE);

		canvas.drawCircle(xPos, yPos, circleRadius, circlePaint);
	}
Step 7: The updatePhysics Method
This function is also called every frame and accomplishes two tasks:
- handle the simple physics of the movement
- Update the position of the ball and make it 'bounce' if it has hit the edge
What may be confusing about this step is how the app determines which way to bounce the ball. The basic concept is that if the ball makes contact with the side, it reverses in the X direction. If the ball hits the top or bottom, it reverses in the Y direction. Also, it is important that when a collision is detected, we immediately set the ball to rest exactly on that wall, not behind it as it already might be. This prevents the ball getting stuck in a loop behind the wall.
	public void updatePhysics() {

		xPos += xVel;
		yPos += yVel;

		if (yPos - circleRadius < 0 || yPos + circleRadius > height) {

			// the ball has hit the top or the bottom of the canvas

			if (yPos - circleRadius < 0) {

				// the ball has hit the top of the canvas

				yPos = circleRadius;
			}else{

				// the ball has hit the bottom of the canvas

				yPos = height - circleRadius;
			}

			// reverse the y direction of the ball
			yVel *= -1;
		}
		if (xPos - circleRadius < 0 || xPos + circleRadius > width) {

			// the ball has hit the sides of the canvas

			if (xPos - circleRadius < 0) {

				// the ball has hit the left of the canvas

				xPos = circleRadius;
			} else {

				// the ball has hit the right of the canvas

				xPos = width - circleRadius;
			}

			// reverse the x direction of the ball
			xVel *= -1;
		}
	}
Step 8: The surfaceCreated Method
This method is called when the workable surface area for the app is first created. You should note that it is never good practice to assume a screen size. Instead, use whatever means necessary to determine width/height information during the app runtime. This method accomplishes the following tasks:
- Grab the rectangle bounding area of the canvas and pass the width and height to the respective variables.
- Set the initial position of the ball to the top center of the screen.
- Create the UpdateThread and start it.
From the point that the UpdateThread begins running, the ball will begin to move:
  	public void surfaceCreated(SurfaceHolder holder) {

		Rect surfaceFrame = holder.getSurfaceFrame();
		width = surfaceFrame.width();
		height = surfaceFrame.height();

		xPos = width / 2;
		yPos = circleRadius;

		updateThread = new UpdateThread(this);
		updateThread.setRunning(true);
		updateThread.start();
	}
Step 9: The surfaceChanged Method
This method is not used in our app but is required by the SurfaceHolder.Callback implementation.
    public void surfaceChanged(SurfaceHolder holder, int format, int width, int height)
    {

    }
Step 10: The surfaceDestroyed Method
This method deals with exiting the app and shutting down the thread. If we tried to shut down the app without dealing with the thread, the user would see a very annoying error dialog everytime they attempt to close the app. This small piece of code will let the thread finish the current task before closing, hence eliminating the error.
	public void surfaceDestroyed(SurfaceHolder holder) {

		boolean retry = true;

		updateThread.setRunning(false);
		while (retry) {
			try {
				updateThread.join();
				retry = false;
			} catch (InterruptedException e) {

			}
		}
	}
Your final MovementView file should now look something like this:
package example.movement;

import android.content.Context;
import android.graphics.Canvas;
import android.graphics.Color;
import android.graphics.Paint;
import android.graphics.Rect;
import android.view.SurfaceHolder;
import android.view.SurfaceView;

public class MovementView extends SurfaceView implements SurfaceHolder.Callback {

	private int xPos;
	private int yPos;

	private int xVel;
	private int yVel;

	private int width;
	private int height;

	private int circleRadius;
	private Paint circlePaint;

	UpdateThread updateThread;

	public MovementView(Context context) {

		super(context);
		getHolder().addCallback(this);

		circleRadius = 10;
		circlePaint = new Paint();
		circlePaint.setColor(Color.BLUE);

		xVel = 2;
		yVel = 2;
	}
	@Override
	protected void onDraw(Canvas canvas) {

		canvas.drawColor(Color.WHITE);
		canvas.drawCircle(xPos, yPos, circleRadius, circlePaint);
	}

	public void updatePhysics() {
		xPos += xVel;
		yPos += yVel;

		if (yPos - circleRadius < 0 || yPos + circleRadius > height) {
			if (yPos - circleRadius < 0) {
				yPos = circleRadius;
			}else{
				yPos = height - circleRadius;
			}
			yVel *= -1;
		}
		if (xPos - circleRadius < 0 || xPos + circleRadius > width) {
			if (xPos - circleRadius < 0) {
				xPos = circleRadius;
			} else {
				xPos = width - circleRadius;
			}
			xVel *= -1;
		}
	}

	public void surfaceCreated(SurfaceHolder holder) {

		Rect surfaceFrame = holder.getSurfaceFrame();
		width = surfaceFrame.width();
		height = surfaceFrame.height();

		xPos = width / 2;
		yPos = circleRadius;

		updateThread = new UpdateThread(this);
		updateThread.setRunning(true);
		updateThread.start();
	}

	public void surfaceChanged(SurfaceHolder holder, int format, int width, int height) {
	}

	public void surfaceDestroyed(SurfaceHolder holder) {

		boolean retry = true;

		updateThread.setRunning(false);
		while (retry) {
			try {
				updateThread.join();
				retry = false;
			} catch (InterruptedException e) {
			}
		}
	}
}
Section Two: Threads
If you started off as a Flash Developer with ActionScript like I did, you probably won't be familiar with the concept of threads. Actionscript had a fantastic way of dealing with movement, but that's not how things roll in the real world. Threads can be used as Android's equivalent to OnFrameLoops, except not as easy to use. From Google's developer site:
A Thread is a concurrent unit of execution.
In plain English, this basically means threads allow multiple things to be accomplished at once in your code.
For example: you never, ever want to have your main Android class waiting for X amount of time to perform an update. Doing so will cause it to become unresponsive and the user will undoubtably become frustrated. Instead, what you do is pass the waiting on to another guy -your custom thread. He runs away happily in the background and doesn't mind waiting X amount of time. Your user is happy too, because the interface isn't dependent on when the thread finishes its work.
Step 11: The Class Outline
Let's look at the code for this thread. All steps following this will be the methods and functions that should be placed inside this class. We will also define our variables here:
package licksquid.movement;

import android.graphics.Canvas;
import android.view.SurfaceHolder;

public class UpdateThread extends Thread {
	private long time;
	private final int fps = 20;
	private boolean toRun = false;
	private MovementView movementView;
	private SurfaceHolder surfaceHolder;

}
Step 12: The UpdateThread Constructor
The main purpose of this constructor is to populate the surfaceHolder variable which will eventually be used to provide a reference of the Canvas.
	public UpdateThread(MovementView rMovementView) {
		movementView = rMovementView;
		surfaceHolder = movementView.getHolder();
	}
Step 13: The setRunning Method
This method serves one simple, but essential purpose: to give the thread permission to run or not to run.
	public void setRunning(boolean run) {
		toRun = run;
	}
Step 14: The run Method
This is the main method of the Thread. The code in this method dictates what is done with each 'tick' of the thread. This is the list of tasks it performs:
- Check if it has permission to run.
- If so, check if the required time has passed to keep in line with the FPS (frames per second) value.
- If so, set the canvas to empty.
- Get a reference to the canvas and lock it to prepare for drawing.
- Update the physics of the ball.
- Draw the ball in the new position.
- If it is safe to do so, lock and update the canvas.
	@Override
	public void run() {

		Canvas c;
		while (toRun) {

			long cTime = System.currentTimeMillis();

			if ((cTime - time) <= (1000 / fps)) {

				c = null;
				try {
					c = surfaceHolder.lockCanvas(null);

					movementView.updatePhysics();
					movementView.onDraw(c);
				} finally {
					if (c != null) {
						surfaceHolder.unlockCanvasAndPost(c);
					}
				}
			}
			time = cTime;
		}
	}
Your UpdateThread file should now look like this:
package example.movement;

import android.graphics.Canvas;
import android.view.SurfaceHolder;

public class UpdateThread extends Thread {

	private long time;
	private final int fps = 20;
	private boolean toRun = false;
	private MovementView movementView;
	private SurfaceHolder surfaceHolder;

	public UpdateThread(MovementView rMovementView) {
		movementView = rMovementView;
		surfaceHolder = movementView.getHolder();
	}

	public void setRunning(boolean run) {
		toRun = run;
	}

	@Override
	public void run() {
		Canvas c;
		while (toRun) {

			long cTime = System.currentTimeMillis();

			if ((cTime - time) <= (1000 / fps)) {

				c = null;
				try {
					c = surfaceHolder.lockCanvas(null);
					movementView.updatePhysics();
					movementView.onDraw(c);
				} finally {

					if (c != null) {
						surfaceHolder.unlockCanvasAndPost(c);
					}
				}
			}
			time = cTime;
		}
	}
}
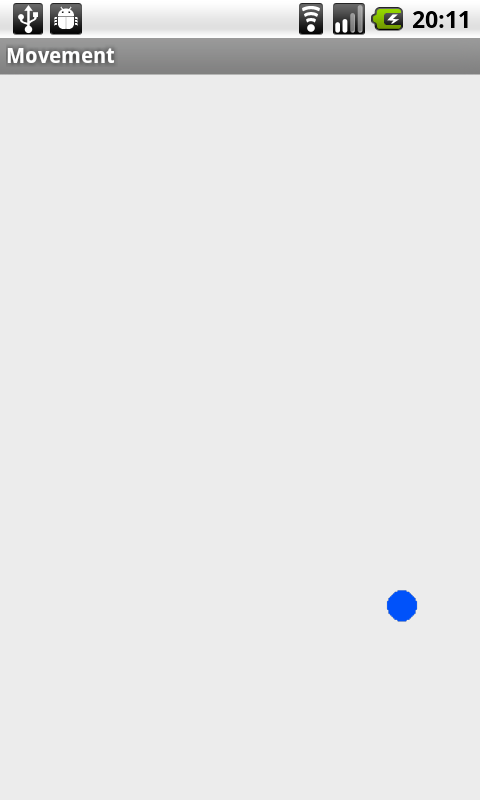
And thats all the coding we need to do. If you run your app now, you should see a ball bouncing around the screen!
Conclusions
Admittedly, this has been a simplistic introduction to achieving movement in an Android application. However, I believe that once you understand the core concepts of everything in this tutorial, it makes it very easy to go on to a much more complex scenario.
For example, to make a space invaders like game, you might put all the aliens sifting side-to-side on one thread that, at a basic level, functions much like the one introduced here. Hopefully you have found this tutorial beneficial! :)

Comments