Any app that you develop will have to include some sort of local resources and values, such as strings, image assets (even if it's just the app icon) and colors. In this tutorial, you learn about resources in Android and how to use them in your apps for displaying content to users, handling different sized devices, and supporting users through various languages.
Do you find it easier to learn with video? Why not check out our course:

1. Adding Resources to Projects
When you create a project in Android Studio, you are provided with two main directories in your project for source files, java and res. Here res stands for resources and, as the name implies, contains the resources for the project. In the context of Android, a resource is a file representing something that can be drawn onto the screen, a layout file for your classes, or a value that can be accessed in your app, such as a string or color hex value. In this section, you learn about the various types of resources available to your application.
Resource Types
In order to use resources in an Android project, you need to organize them into subdirectories in the res folder. The resource directory structure of a standard Android project may look something like this:
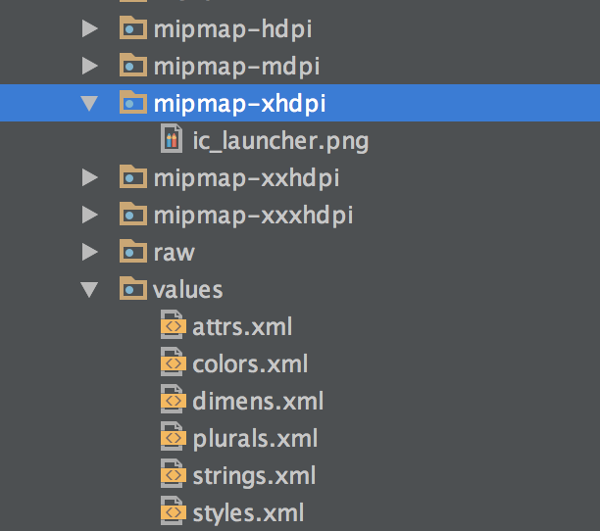
There are a limited number of directory names that are supported by the Android resource system and understanding them is necessary as you continue to develop Android apps. Let's take a look at them in more detail.
-
animator: The animator resource directory can contain XML files that define animations for
Viewobjects in your app. Rather than defining animations over and over again in your Java code, you can import an animator XML file in every place that you need to use a specific animation. If you decide to change that animation later, you can change it in one location in your app rather than many. -
color: Though you can save color hex values in the values directory, the color directory is used for storing XML files that correlate state information with specific colors. This is useful if you need to change the color of a
View's text or background when touched to provide feedback to the user. - drawable: If your app requires local image assets, such as JPGs and PNGs, then you need to place them in the drawable folder. This is also where you place XML files that define shape and vector drawables, or images that are drawn in code.
- mipmap: Similar to drawable, the mipmap directory accepts bitmap items, but it is used specifically for the app launcher icon. This is necessary because Android uses images one size larger than what the device generally uses for launcher icons.
- layout: The layout directory contains the XML files that define your app's user interfaces.
- menu: Menu XML files are used for defining action bar and navigation menus and submenus. These resources are placed in the menu resource directory.
- raw: The raw directory is used for storing arbitrary raw files for your application, such as audio, video, and text files. This provides an easy way to access files, though if you need access to the original file name or directory hierarchy, you should consider placing your raw files in Android's asset directory.
- xml: This directory houses arbitrary XML files used by Android for various tasks, such as defining search configurations or external capabilities, such as the use of Android Auto.
Values
While the above list of available resource directories is rather long, there is one more directory that you will be using often as an Android developer and that is the values directory. The values directory can contain many XML files consisting of simple values that are used within your applications, including:
- arrays: Simple array objects that can be read in to your application.
- colors: Named color hex values that can be used in multiple locations within your app.
- dimens: Dimensions can define anything related to size in Android, including text and padding sizes.
- integers: If there are specific integers that you need to use in your application, you can store them in the integers resource file so that they are easy to find and change later in your development process.
- strings: Strings are a necessity in any Android application that you build. Rather than spreading them around in your codebase, you can keep strings in the strings.xml value file.
- plurals: Similar to strings, plurals allows you to provide alternative strings when a number is passed into the retrieval function. This handles situations where a string quantifier should change based on the number of items it represents.
-
styles: Any app that you build needs a consistent look and feel and this can be achieved through the use of the styles.xml file. Using styles, you can override the default look for components and predefine attributes that can be associated with different
Viewobjects in layout files.
As you can see, the resources framework in Android is extensive. As you continue to develop apps, you will find more and more uses for resource files and values to make developing and maintaining your applications faster and easier.
2. Accessing Resources
Now that you know how to add resources to your application, you need to be able to access them. All resources stored in your app are automatically assigned an identifiable name consisting of the resource type, such as drawable or layout, and the id in the application's R file. The R file is a file generated by the Android Asset Packaging tool, or aapt, during compilation. This generated name can be used to access the resource in either your Java code or another XML resource file.
Accessing Resources In Java
Many objects in Android are built with resource identifiers in mind and accept the id for a resource in order to use that resource. An example of this is setting an ImageView to use a drawable resource by passing in the R drawable id.
mImageView.setImageResource(R.drawable.test);
Similarly, a MediaPlayer object (used for playing back audio or video media) can be created to play a raw media file by passing in the file's R id.
MediaPlayer.create(getActivity(), R.raw.sample_media)
While a large number of objects accept a resource id, there are times where you want to retrieve the original resource in your code. You can do this by using the getResources() method available in the Context object of Android. This returns a Resources object with multiple methods for accessing local app resources, such as getColor() and getDrawable().
getResources().getColor(R.color.colorPrimary);
getResources().getDrawable(R.drawable.kittens);
Accessing Resources In XML
The majority of the time when you are using resources, it will be in other XML files. By defining colors, styles, text, or any other resource that is used in various places of your app, it makes maintainability simpler by allowing you to change one value and have it populate across your application. Luckily you can access resources in an XML attribute by passing the id to a field that expects a resource id.
<TextView
    android:id="@+id/tv_test"
    android:layout_width="wrap_content"
    android:layout_height="wrap_content"
    android:background="@color/colorPrimary"
    android:text="@string/title"
    style="@style/TitleStyle"/>
3. Providing Alternative Resources
Almost every application that you build should handle various device sizes, configurations, and user languages. By appending specific qualifiers to the end of a resource directory, the Android system prioritizes those resources when certain conditions are met.
Screen Density
To avoid pixilation, the bitmap assets you create for your apps should be made for specific pixel densities. By appending -ldpi, -mdpi, -hdpi, and other qualifiers to directory folders, as seen for mipmaps in the image at the beginning of this article, the Android system knows which assets to use for any particular device running your app.
User Languages
You can create individual values directories for each language your app supports by appending a language code to the end of the directory name, such as values-fr or values-es for French and Spanish.
When a user has their language set to one of these languages, the system provides any values in the new resource directory to the user, rather than the defaults. This is useful for replacing string resources with proper translations.
Tablet and Orientation Support
You can append -land to a resource directory to have those values override the defaults when a device is in landscape mode. You can also define a minimum width of a device for a resource directory to override the default in order to support tablets by appending -sw600dp for medium sized tablets (such as Nexus 7) and -sw720dp for larger tablets.
Conclusion
Any app that you build will include resources and understanding how to access them and support various device configurations is an important part of being an Android developer. In this article, you learned what sort of resources can be included in an application, how to access them in Java and XML, and how to override resources in specific situations.

Comments